This is where I had a little trouble. Seems I’m not alone. Folks on the local 2 meter nets sometimes talk about confusion on how to connect a Hotspot to WiFi. So the next section will fast-forward to that step in the process.
- Get an RFID
- Every User on DMR has an ID Number that’s linked to their Call Sign. The RFID is issued by RadioID.net. You’ll need this to setup your radio and join networks.
- Join a Network
- Register for an account on the Brandmeister Network. It’s easy and has an active worldwide talkgroup (TG 91) that will be good for testing your setup and making your first QSOs.
- Get a Raspberry PI Hotspot
- You can buy one or build one from parts (a bit cheaper and more fun); Ready made Hotspots and/or parts to build one are all over on Amazon, Aliexpress, and elsewhere.
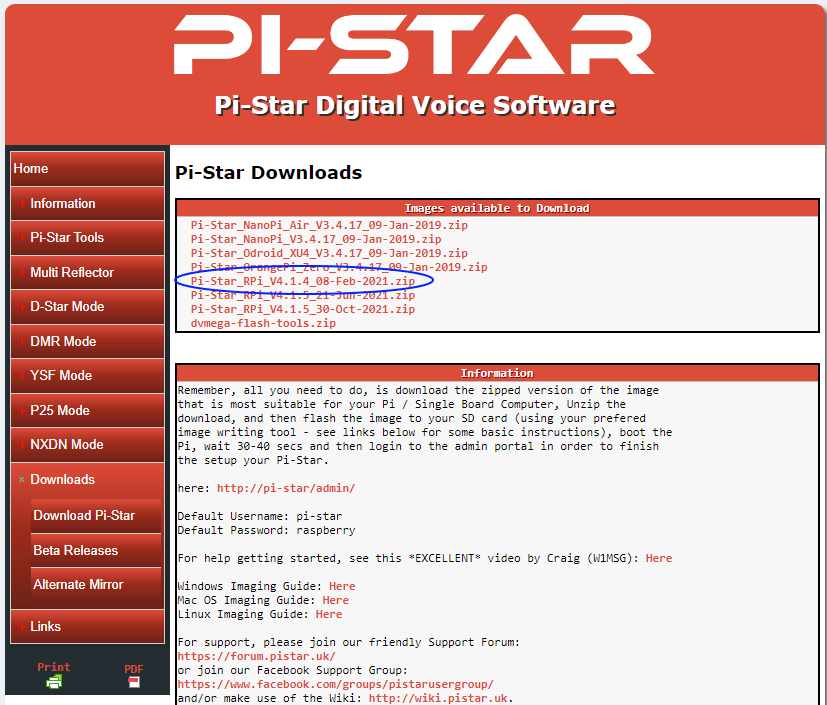
- Download the latest version of the Pi Star image (img) file from pistar.uk
- Select the latest “Pi-Star_RPi file”
- Note the useful Information; You’ll need it later.
- Burn the Pi Star boot image to a fresh micro SD card; An 8G card is plenty.
- There’s loads of info on how to do this on the internet
This is a point in the process where I discovered a significant “Wish I Had Known That Moment”. The next step is getting the Hotspot to connect to your WiFi. Turns out there’s several different ways to do this. Figuring out what’s easiest for you is the challenge. What follows is the method I’m most comfortable with… No dragging out cables and stuff.
Select the WiFi Builder, under Pi Star Tools in the left menu. This tool will create a file named “wpa_supplicant.config”. This file will tell your Raspberry Pi the WiFi settings at first boot up.
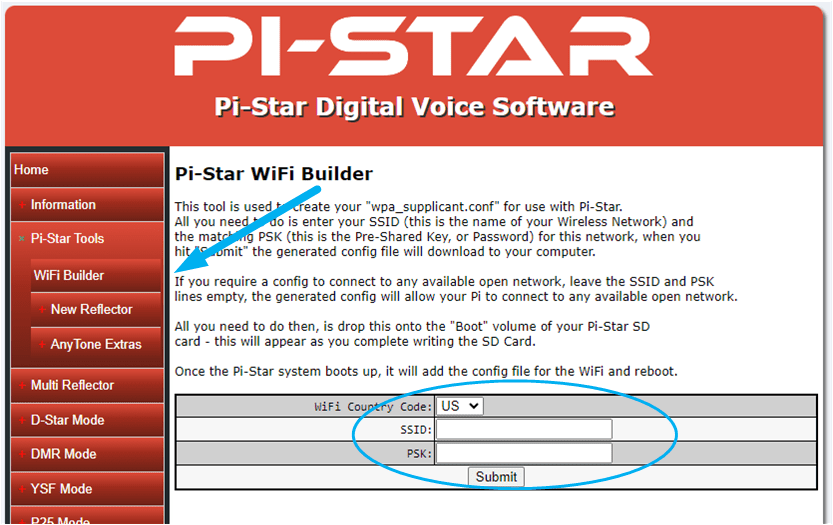
- Create a “wpa_supplicant.config” file
- You’ll need the SSID and WPA Password for your WiFi network.
- The file will be written to your Downloads folder
- Copy the “wpa_supplicant.config” file to the root on the Pi Star Boot micro SD card you just made
- Insert the card into your Hotspot and Power it ON
As mentioned, there are other ways of getting the WiFi settings right. You can connect a monitor and keyboard to your Pi and configure the WiFi by command line. Or, you can connect the Hotspot to your router via Cable, or connect it direct to your PC with a cross-over cable. This gets you into the Pi Star Dashboard by entering pi-star.local in your browsers address bar. From there, you can manually set the WiFi. For me, creating the file and letting the Pi do the work is easiest.
The wpa_supplicant.config file is used by your Raspberry PI during initial boot-up to set the WiFi connection to your network. Pi Star will apply these same settings automatically. It may take several minutes for your hotspot to fully boot; Older, less powerful PIs will take longer.
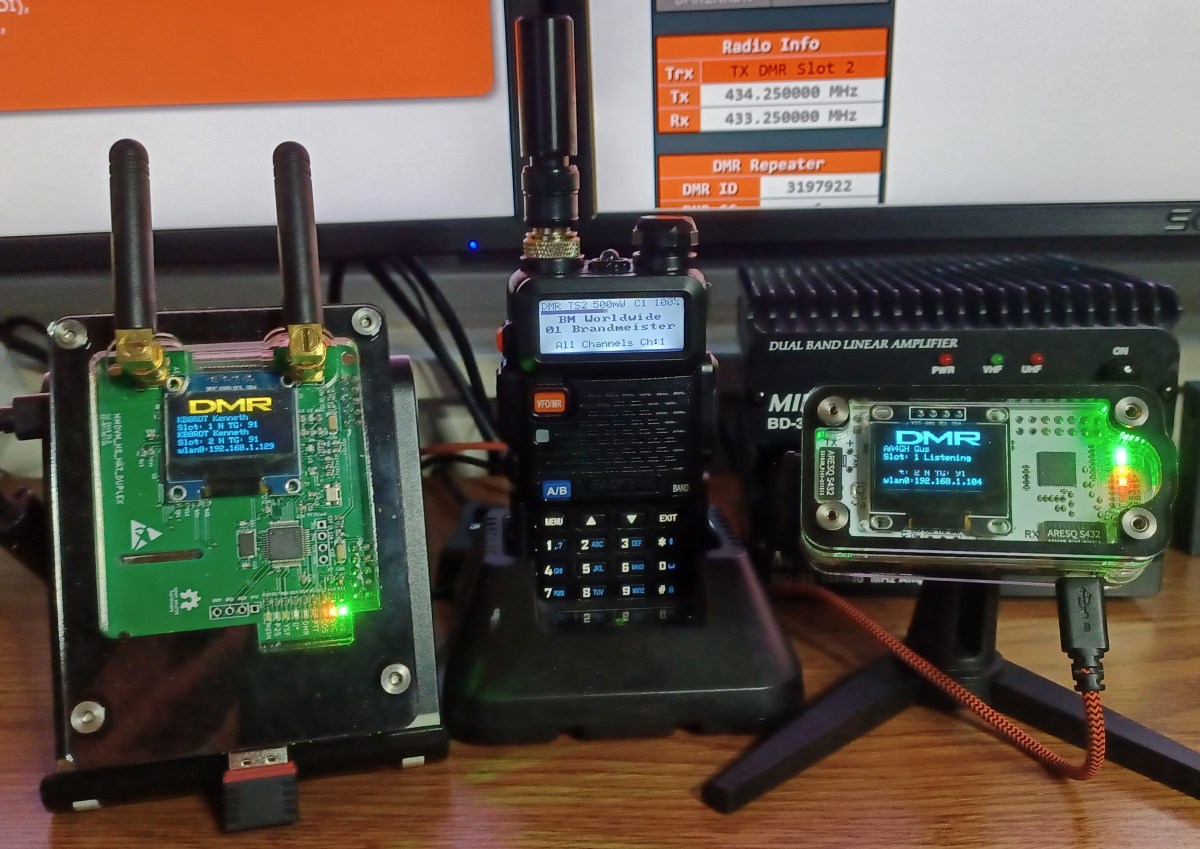
If your Hotspot has a OLED, you’ll know when it started up. If not, watch the LEDs; The green and yellow should be constant, and the red LED next to the green one should be flashing. Note: After initial boot… the wpa_supplicant.config file will be deleted from the SD card automatically.
